How to Install Ubuntu on Windows with WSL: Complete Step-by-Step Guide


WSL (which stands for "Windows Subsystem for Linux") is a feature of Microsoft Windows that allows users to run a Linux distribution alongside a Windows window, using a compatibility layer. It was released in 2016, but the current version is WSL 2, which supports several Linux distributions, including Ubuntu, Debian, and Fedora.
WSL is beneficial for developers as it eliminates the need for additional hardware, virtualization, or dual boot configurations to manage Linux filesystems or access the Linux command line and tools.
With WSL, you can easily switch between Windows and Linux workflows, allowing you to take advantage of Linux-specific tools while still benefiting from Windows features as your main operating system.
How to install WSL on Windows
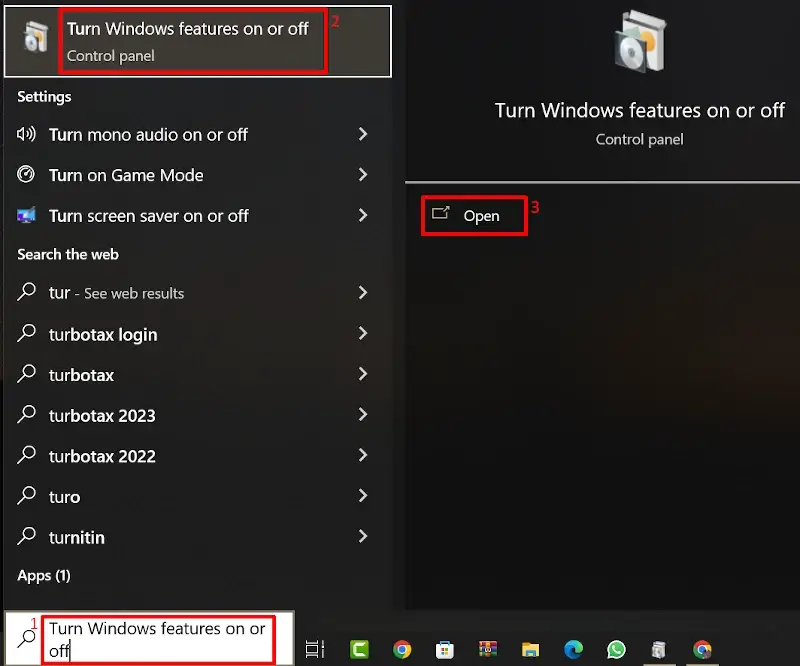
To enable WSL on Windows, use the Windows key on your keyboard together with the S key. In the search box, type "Turn Windows features on or off", and then click Open.
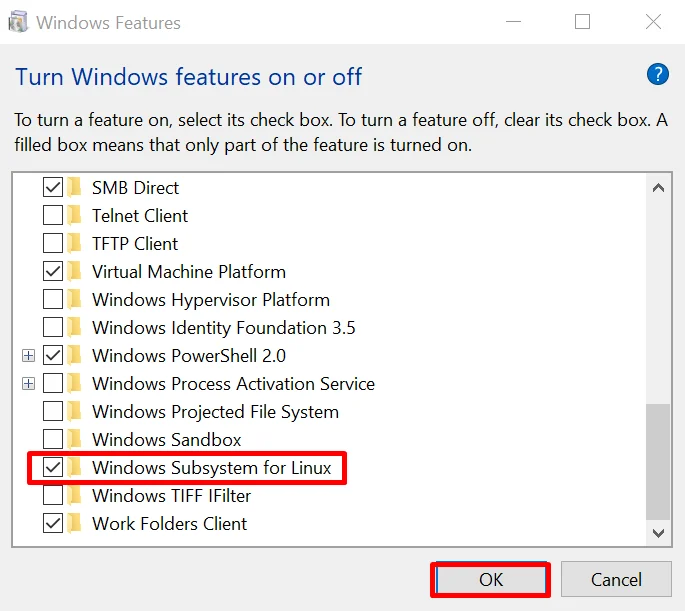
The Windows Features dialog box will open. Here, locate the "Windows Subsystem for Linux" option and check the associated checkbox. Finally, click the "OK" button.
Now restart Windows.
To install Ubuntu on Windows
To install Ubuntu on Windows using WSL 2, you need to enable WSL on Windows by following a few simple steps:
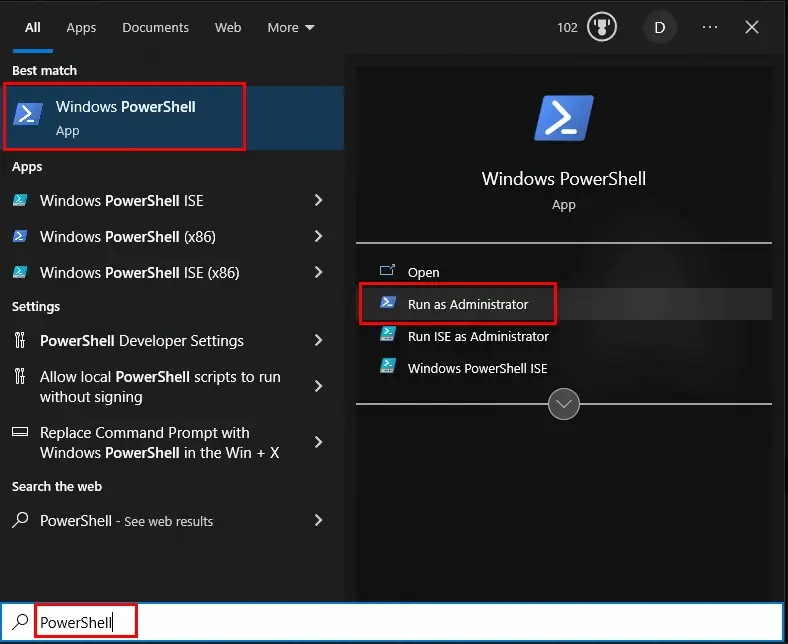
- Run PowerShell as administrator. Click Start, type PowerShell, right-click the PowerShell icon, and then click Run as administrator
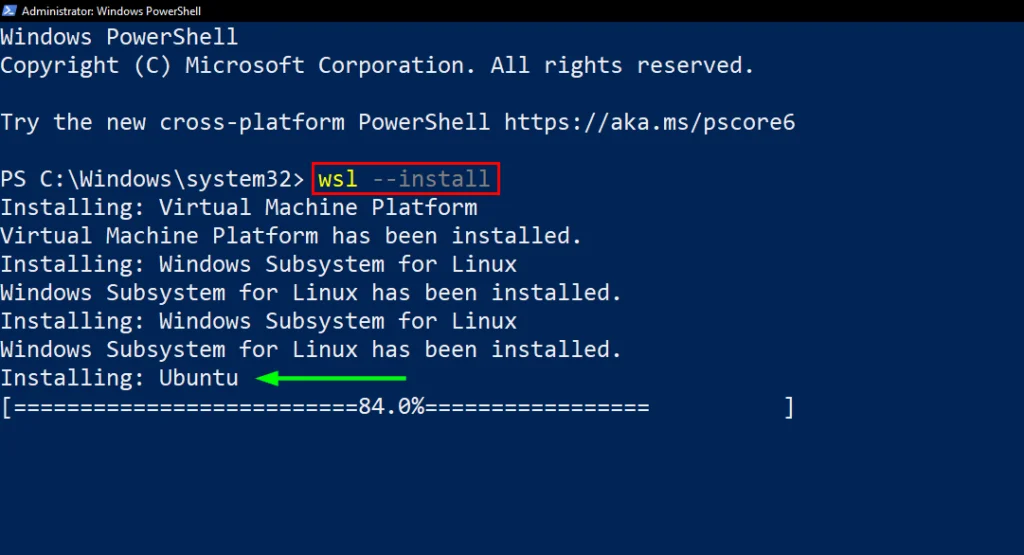
2. At the PowerShell command prompt, type the command "wsl --install".
This command takes care of everything, including enabling the necessary Windows features, installing the WSL Linux kernel update package, and setting up Ubuntu.
After the installation process completes, restart your Windows system to access Ubuntu. After restart, the additional Ubuntu installation and setup process will start automatically and will take some time, so wait until it completes.
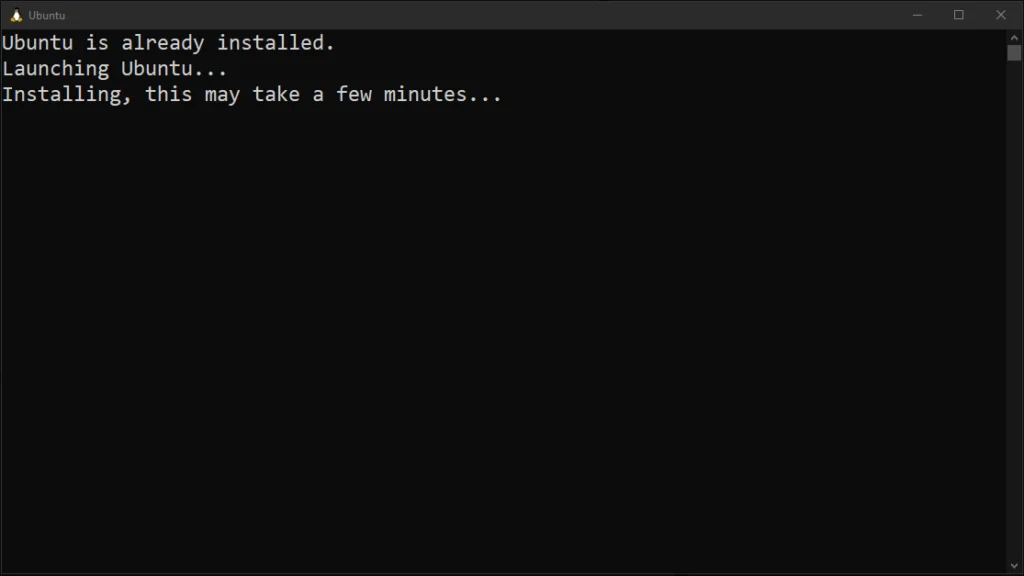
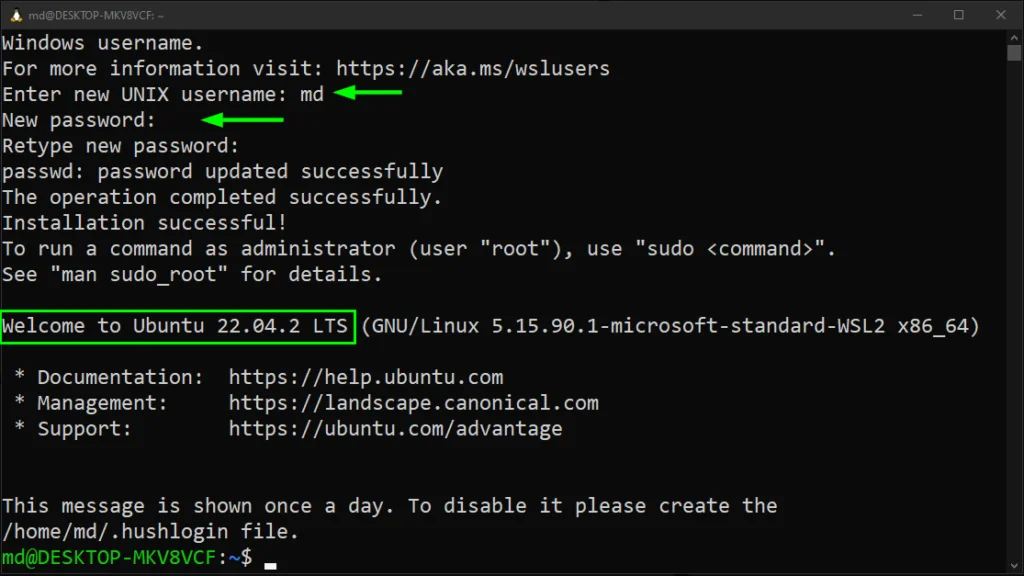
The next step is to provide the username for Ubuntu (22.04) and also set your password. After that, you will be able to run commands in Ubuntu.
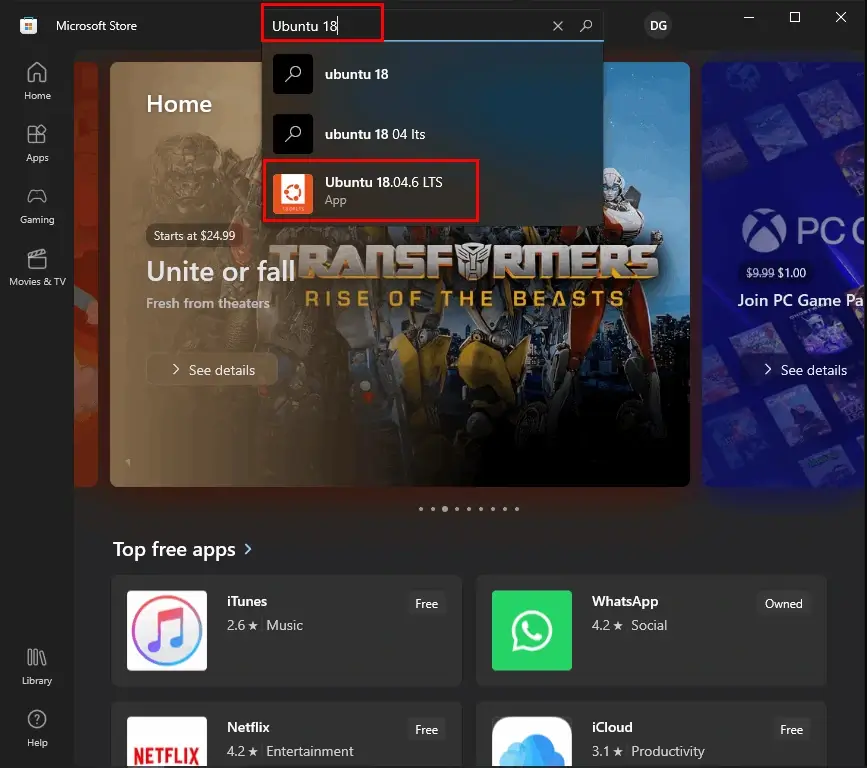
Once installed, you can launch Ubuntu from the Start menu or by searching for "Ubuntu" in the menu.
Remember to update Ubuntu with the command:
sudo apt update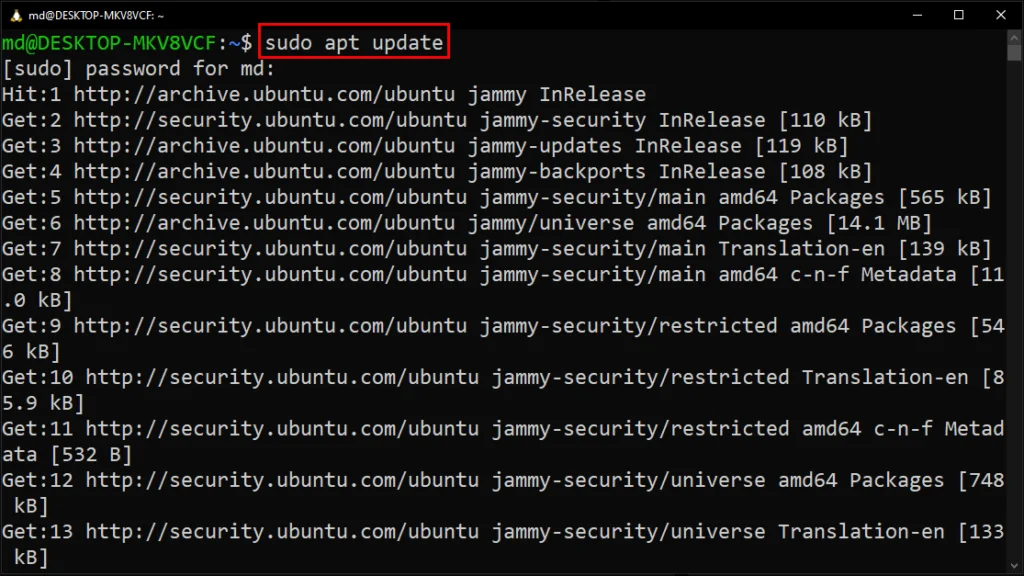
I hope this guide has been helpful for installing Ubuntu on your Windows using WSL. Now you have no excuse to learn Linux.

Prof. Uirá Ribeiro
Chair do Board do Linux Professional Institute
After years of watching professionals waste hours on simple tasks because they didn't know the right Linux tools, I decided to teach.
Today I'm the author of most of LPI's official Learning Materials and mentor to over 14,000 certified students.
That was just one piece. The course teaches the whole path — from your first command to exam day.